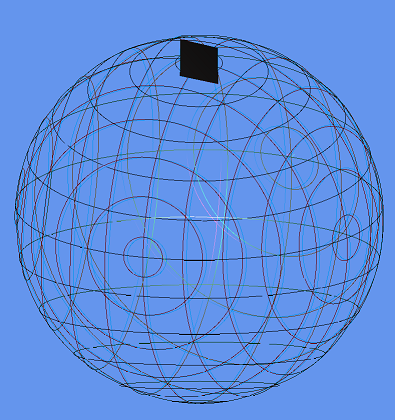
XNA stereoscopic 3D using anyglyphs and red/cyan 3D-glasses
Anaglyphs are images designed to give a 3D effect when viewed with special glasses, usually with red and blue (sometimes red and cyan) filters over the left and right eyes, respectively.[1]
Using anaglyphs we can make our game look real 3D through those cheap red/cyan 3D-glasses. Adding an anaglyph effect to your XNA game is fairly easy.
Basically we need to undertake the following steps: -Draw our scene twice to separate render targets, with a slightly offset camera -Use a shader and draw a full screen quad to blend the images and color coding the images for each eye
Easy right!
Lets start by assuming you have the following draw code:
protected override void Draw(GameTime gameTime)
{
    //a lot of draw calls
    base.Draw(gameTime);
}
We need to extract all your drawing code (except base.Draw(..)) to a new method that as argument accepts a view matrix. Update your code so that the passed viewMatrix is used instead of your normal camera’s viewMatrix. Doing this will allow us to easily draw the scene twice with a slightly offset camera. You should now have something like this:
private void DrawForEye(Matrix viewMatrix)
{
    //...
}
Now let’s first write the shader that is going to blend the images, create a new effect in your content project and paste in the following code:
texture left;
sampler sLeft = sampler_state
{
	texture = ;
	magfilter = POINT;
	minfilter = POINT;
	mipfilter = POINT;
	AddressU  = CLAMP;
	AddressV  = CLAMP;
};

texture right;
sampler sRight = sampler_state
{
	texture = ;
	magfilter = POINT;
	minfilter = POINT;
	mipfilter = POINT;
	AddressU  = CLAMP;
	AddressV  = CLAMP;
};

struct VS_INPUT
{
	float3 Pos : POSITION;
	float2 Tex : TEXCOORD0;
};

struct VS_OUTPUT
{
	float4 Pos : POSITION;
	float2 Tex : TEXCOORD0;
};

void VtAnaglyph(VS_INPUT In, out VS_OUTPUT Out)
{
	Out.Pos = float4(In.Pos,1);
	Out.Tex = In.Tex;
}

float4 PxAnaglyph(VS_OUTPUT In) : COLOR0
{
    float4 colorLeft = tex2D(sLeft, In.Tex.xy);
	float4 colorRight = tex2D(sRight, In.Tex.xy);
    return float4(colorRight.r, colorLeft.g, colorLeft.b, max(colorLeft.a, colorRight.a));
}

technique Anaglyphs
{
    pass p0
    {
        VertexShader = compile vs_2_0 VtAnaglyph();
        PixelShader = compile ps_2_0 PxAnaglyph();
    }

}
This is a pretty standard HLSL shader, but I will quickly go over it.
The texture’s left and right will be the textures resulting from drawing the scene twice, slightly offset from each other. We use a sampler with POINT filters because the left and right textures are going to be exactly the same size as our final rendering.
The vertex shader is passed as input nothing more than the position and texture coordinate of the vertex, it doesn’t transform anything but it just directly passes to the pixel shader.
The pixel shader samples the textures for the left and right eye. The red channel is used to ‘encode’ the image for the right eye (the red is unfiltered by the cyan colored lens). The green and blue channel are taken from the image for the left eye (they are unfiltered by the red colored lens). You can look at this wikipedia entry for other color combinations in case you have different 3D-glasses.
Now that we have our effect we need to add 2 render targets, the effect and a quad renderer to our game class. (The Quad class is posted as a code snippet here and used as to render the final image).
Added these lines to the top of your game class.
RenderTarget2D leftEye;
RenderTarget2D rightEye;
Effect anaglyphEffect;
QuadRenderer quad;

//you can change this later to test different distances between the left and right eye viewpoint,
//the offset depends on the scale of your game, but small values seem to work best.
//I used 0.05 for a scene about 5x5x5 size.
float ammount = 0.05f;
And add these lines in your LoadContent method:
leftEye = new RenderTarget2D(GraphicsDevice, GraphicsDevice.Viewport.Width, GraphicsDevice.Viewport.Height);
rightEye = new RenderTarget2D(GraphicsDevice, GraphicsDevice.Viewport.Width, GraphicsDevice.Viewport.Height);
anaglyphEffect = Content.Load("Anaglyphs");
quad = new QuadRenderer(GraphicsDevice);
Now we need to calculate two slightly offset view-matrices, draw the scene two times using these view-matrices and then combine them using our effect. To accomplish this write the following Draw method:
protected override void Draw(GameTime gameTime)
{
    Matrix viewMatrix = camera.ViewMatrix; //use your own camere class here

    //The vector pointing to the right (1,0,0) as seen from the view matrix is stored
    //in the view matrix as (M11, M21, M31)
    Vector3 right = new Vector3(viewMatrix.M11, viewMatrix.M21, viewMatrix.M31) * amount; //ofset from the center for each eye
    Matrix viewMatrixLeft = Matrix.CreateLookAt(camera.Position - right, camera.LookAt, Vector3.Up);
    Matrix viewMatrixRight = Matrix.CreateLookAt(camera.Position + right, camera.LookAt, Vector3.Up);

    GraphicsDevice.SetRenderTarget(leftEye);
    DrawForEye(viewMatrixLeft, camera.ProjectionMatrix);

    GraphicsDevice.SetRenderTarget(rightEye);
    DrawForEye(viewMatrixRight, camera.ProjectionMatrix);

    GraphicsDevice.SetRenderTarget(null);

    anaglyphEffect.Techniques["Anaglyphs"].Passes[0].Apply();
    anaglyphEffect.Parameters["left"].SetValue(leftEye);
    anaglyphEffect.Parameters["right"].SetValue(rightEye);
    quad.DrawFullScreenQuad();

    base.Draw(gameTime);
}
And hooray! We now have anaglyphs in our game! This will result in some pretty picture (the following picture of course only make sense when you use red/cyan 3D-glasses)

When you have created some cool anaglyph images in XNA, be sure to send them in, I’ll make a small gallery here!
- roytries
- roy-t
- roytri